
RPLidar SetUp On Windows PC

An RPLIDAR (short for Robust and Precise LIDAR) is a 2D laser scanner (LIDAR = Light Detection and Ranging) used primarily in robotics and mapping applications to detect distances to objects in its surroundings. It is a low-cost, compact, and 360-degree scanning with a range of 2 metres LIDAR sensor produced by a company called Slamtec.

What does an RPLIDAR do?
It emits laser pulses and measures the time it takes for the pulses to bounce back from surrounding objects. By rotating 360°, it collects distance data from all directions, allowing it to build a 2D map of the environment.
Common Uses:
Robotics navigation and obstacle avoidance
Autonomous vehicles
SLAM (mapping and localization)
Indoor/outdoor mapping
Object detection
RPLidar Set Up For Windows PC
*Ensure the RPLidar is connected to your PC via USB.
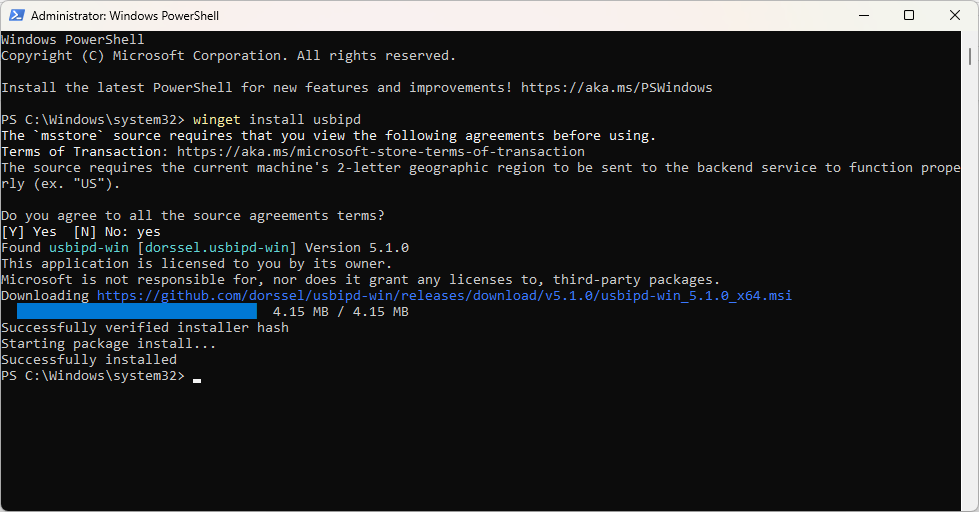
To enable your WSL detect the RPLidar from your ports, you first have to install usbipd. Open Windows PowerShell as admin and copy the command below to install usbipd.
winget install usbipdUsbipd will install as shown below:
Restart your PC.
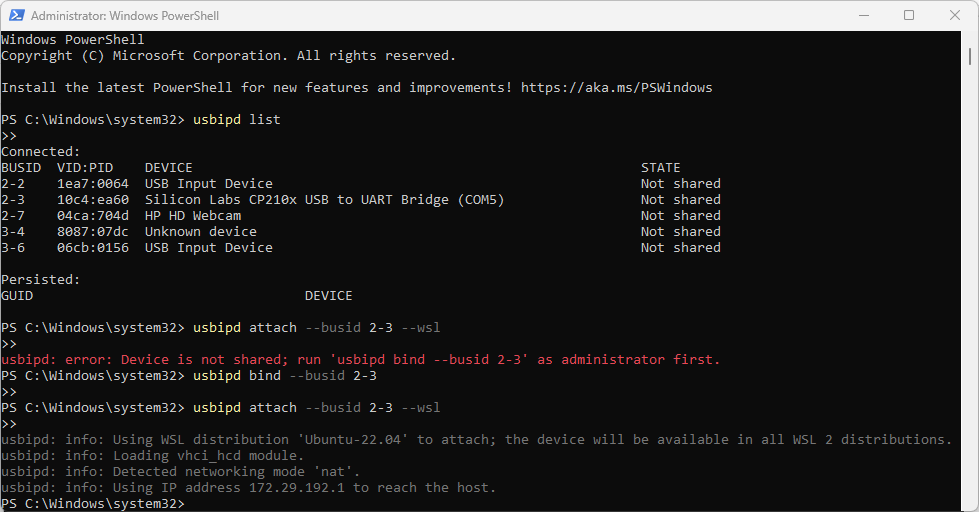
Open a new Windows Powershell as administrator and run the code below to list USB devices that are available for sharing over the network using the USB over IP protocol.
usbipd listThen bind (share) a USB device with bus ID
2-3on your Windows host, making it available for remote access over USB/IP—typically for use in WSL. Run the code below to implement this.
usbipd bind --busid 2-3Then attach a USB device (with bus ID
2-3) from Windows into WSL2.
usbipd attach --busid 2-3 --wslThe above processes will be visible on your PC as shown below:
Open your WSL and run the code below to view the port the RPLidar is connected to.
ls /dev/ttyUSB*It should output a port such as: /dev/ttyUSB0
Now clone the sllidar_ros2 repo on your workspace under your src file as shown below:
cd ~/ros2_ws/src
git clone https://github.com/Slamtec/sllidar_ros2.git
If you don’t have a workspace create it as shown below:
mkdir -p ~/ros2_ws/src
cd ~/ros2_ws
colcon build
Get out of your src file and be in your workspace by running the code below
cd ..or
cd ~/ros2_wsSource your environment by running the code below:
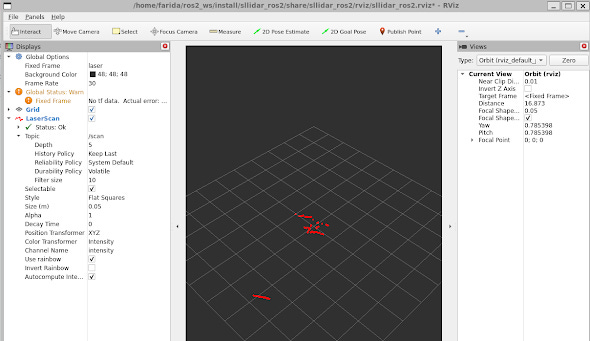
source install/setup.bashLaunch your RPLidar as shown below:
ros2 launch sllidar_ros2 view_sllidar_a1_launch.py serial_port:=/dev/ttyUSB0This will open Rviz and you’ll be able to visualize your RPLidar in real time as shown below:
Incase of any problems encountered with the setup refer to: Troubleshooting tips when setting up the RPLidar A1
Nice guide but you assume that everyone will already have all the workspace and dependencies installed.
I found this site directly and did not have ROS, etc. Maybe extend you guide to either include adding these or where to get the information.